ANT-346 : Know your data with machine learning in Open Distro for Elasticsearch
Introduction
Open Distro for Elasticsearch is a value-added distribution of Elasticsearch that is 100% open source (Apache 2.0 license) and supported by AWS. Open Distro for Elasticsearch leverages the open source code for Elasticsearch and Kibana.
In addition to Elasticsearch and Kibana, the release includes a set of advanced security, event monitoring & alerting, performance analysis, SQL query and the latest machine learning k-NN search and anomaly detection features. In addition to the open source code, Open Distro for Elasticsearch and Kibana are available as RPM, Debian, Linux tarball packages and Docker containers, with separate downloads for the SQL JDBC driver and the PerfTop CLI client. You can run this code on your laptop, in your data center, or in the cloud.
As your application log data grows exponentially, searching and analyzing data in an automated way is essential to gathering a deep understanding of the system. Applying machine learning for search applications enables you to understand behavior patterns and identify solutions that remove bottlenecks getting in the way of processing data at scale. The machine learning exercises in this workshop will help you learn about the ML capabilities available in Open Distro for Elasticsearch and how you can benefit from using these features for data analysis. We survey the ML plugins available in Open Distro, including k-NN search and anomaly detection, and how to set up an ML pipeline for search queries.
In this workshop, we will deploy an Open Distro for Elasticsearch cluster in AWS and explore these features.
We will use the OPN-302 lab guide for a step-by-step process to set up Open Distro for Elasticsearch environment and implement the labs for goals 1-5 below. For goals 6-8, we will set up an Elasticsearch environment for the k-NN plugin through a Cloud 9 IDE.
Part 1: Deploy and explore Open Distro for Elasticsearch
In the first part of the lab, you will familiarize yourself with Open Distro for Elasticsearch. You will explore the Performance Analyzer, Security, Alerting, and SQL plugins, following the guide here:
https://reinvent.aesworkshops.com/opn302/
Please complete the guide, and return here.
Part 2: Know your data with Machine Learning
Now that you know everything about Open Distro for Elasticsearch, let's change topics and dive deep on our Machine Learning plugins.
Lab Goals
- Configure a k-NN search index
- Run a k-NN search query
- Understand score evaluation from a k-NN search query
Lab 1 – Configure a k-NN search index
Steps:
This machine learning lab uses Cloud 9 to set up an environment for running the k-NN plugin. Please ensure that you are logged into the AWS Console to access the Cloud 9 service.
- Please ensure that your console is set to the US West (Oregon) region.
-
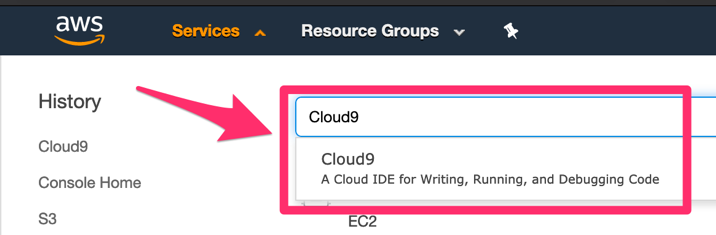
Drop down the Services menu and type Cloud9 in the service search box. Click Cloud9, an IDE for writing and running your code.
-
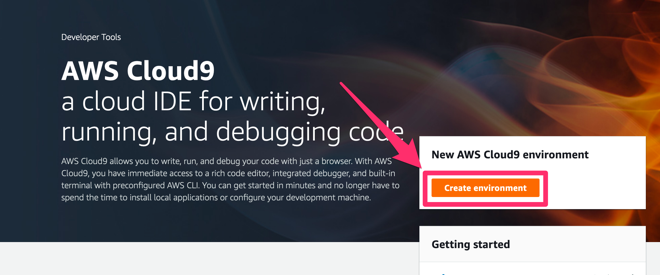
You will see the Cloud9 splash page. Click Create environment to get started.
-
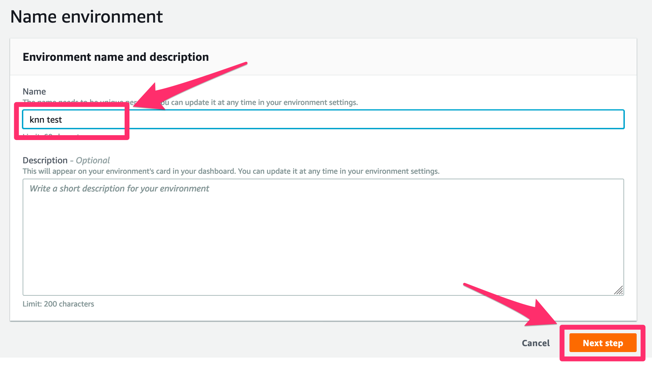
Type a Name for the environment you are creating
-
Click Next step
-
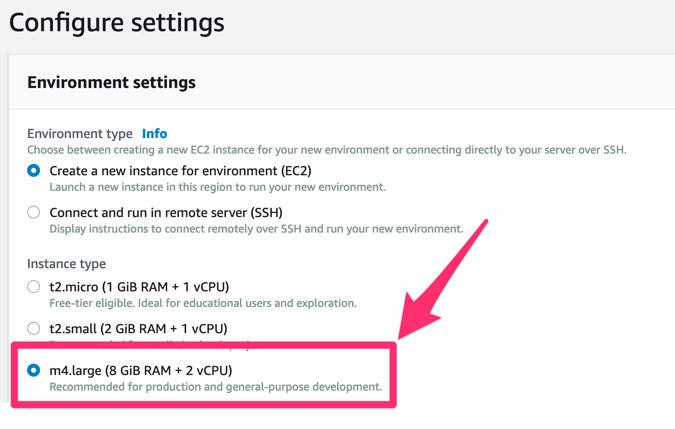
Configure the environment settings for your new setup. Click Create a new instance* for environment (EC2) *and select m4.large as the instance.
-
Scroll down the page to the further settings section. You will need a VPC and Subnet ID to fill this section out. You can get those from the CloudFormation stack you deployed in part 1 of this workshop. Navigate to the CloudFormation console.
-
Select the -Network stack from the Stacks dashboard.

-
Click the Resources tab from the stack's console.
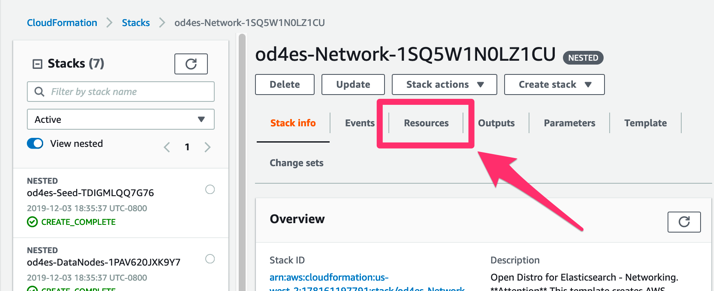
-
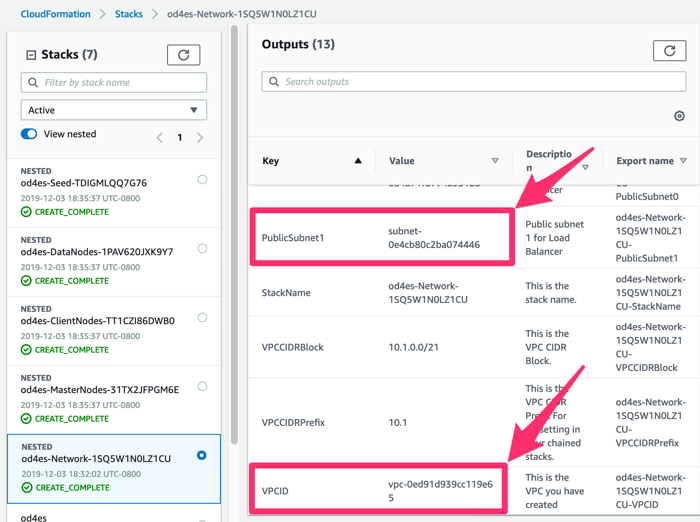
Scroll down and find (or type to filter for) the PublicSubnet1 and VPCID. _ IMPORTANT! _: be sure to select the Public subnet.
-
Note down the Value for PublicSubnet1 and VPCID
-
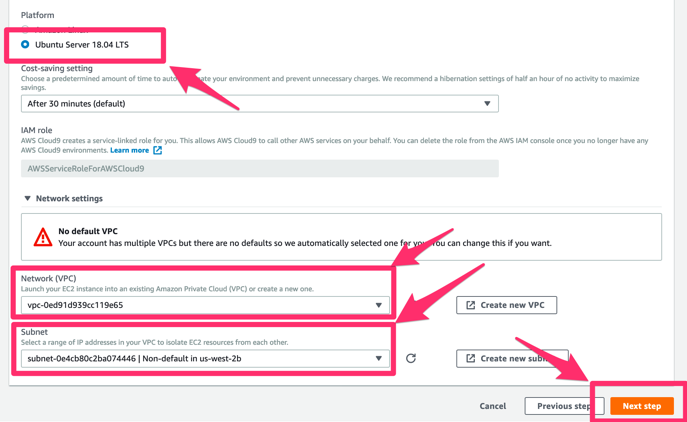
Return to the Cloud9 console
- Select Ubuntu Server 18.04 LTS as your Platform
- Select the VPC and Subnet that you found in CloudFormation
-
Click Next step
-
Click Create environment
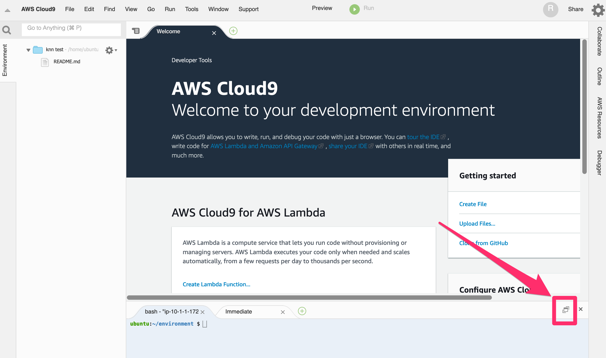
-
Once your Cloud9 environment is created and setup, download and install Elasticsearch-OSS 7.2.0 from the upstream project. RunK4 the commands below to set up your Elasticsearch environment to run the k-NN plugin.
Download Elasticsearch OSS (Apache 2 licensed open source) version 7.2.0
sudo su -wget https://artifacts.elastic.co/downloads/elasticsearch/elasticsearch-oss-7.2.0-amd64.debdpkg -i elasticsearch-oss-7.2.0-amd64.deb -
Download k-NN plugin artifacts. a. Download native library (libKNNIndexV1_7.3.6.so)
wget https://github.com/opendistro-for-elasticsearch/k-NN/releases/download/V1.2.0.0-alpha.1/libKNNIndexV1_7_3_6.so -O /usr/lib/libKNNIndexV1_7_3_6.sob. Download version 1.2.0.0-alpha.1 of the k-NN plugin from the github.com/opendistro-for-elasticsearch/k-NN repo and install.
/usr/share/elasticsearch/bin/elasticsearch-plugin install https://github.com/opendistro-for-elasticsearch/k-NN/releases/download/V1.2.0.0-alpha.1/opendistro-knn-1.2.0.0.zipc. Start the Elasticsearch process.
systemctl start elasticsearchd. Verify Elasticsearch process is up and running.
curl http://localhost:9200/ -
Create a k-NN index with the following command.
curl -X PUT "localhost:9200/myindex" -H 'Content-Type: application/json' -d'
{
"settings" : {
"number_of_shards" :   1,
"number_of_replicas" : 0,
"index": {
    "codec": "KNNCodec"
    }
},
"mappings": {
    "properties": {
        "my_vector": {
        "type": "knn_vector"
        }
    }
}
}
'
- Use the following commands to index the k-NN fields.
curl -X POST "localhost:9200/myindex/_doc/1" -H 'Content-Type: application/json' -d'
{
"my_vector" : [1.5, 2.5],
"price":10
}
'

curl -X PUT "localhost:9200/myindex/_doc/2" -H 'Content-Type: application/json' -d'
{
"my_vector" : [2.5, 3.5],
"price":12
}
'

curl -X PUT "localhost:9200/myindex/_doc/3" -H 'Content-Type: application/json' -d'
{
"my_vector" : [3.5, 4.5],
"price":15
}
'

curl -X PUT "localhost:9200/myindex/_doc/4" -H 'Content-Type: application/json' -d'
{
"my_vector" : [5.5, 6.5],
"price":17
}
'

curl -X PUT "localhost:9200/myindex/_doc/5" -H 'Content-Type: application/json' -d'
{
"my_vector" : [4.5, 5.5],
"price":19
}
'
- Run a search query for k-NN fields indexed in the previous step with the following commands.
For running a simple query, type in the following command.
curl -X POST "localhost:9200/myindex/_search" -H 'Content-Type: application/json' -d'
{"size" : 2,
 "query": {
  "knn": {
   "my_vector": {
     "vector": [3, 4],
     "k": 2
   }
  }
 }
}
'
For running a k-NN query combined with using other fields, use the following commands.
curl -X POST "localhost:9200/myindex/_search" -H 'Content-Type: application/json' -d'
{
  "size" : 2,
  "query": {
    "bool": {
      "must" : {
        "knn": {
          "my_vector": {
            "vector": [3, 4],
            "k": 2
          }
        }
      },
      "filter": {
        "range" : { "price" : { "lt" : 15 } }
      }
    }
  }
}
'
Analyze scores from the k-NN search query run in the previous step.
-End of Lab-